You can buy the best tent on the market and still get soaked if you pitch it poorly. On the flip side, a modest shelter, pitched smart, will ride out storms that fold overpriced gear. Skill trumps logos.
Why Pitch Technique Matters More Than Brand Names
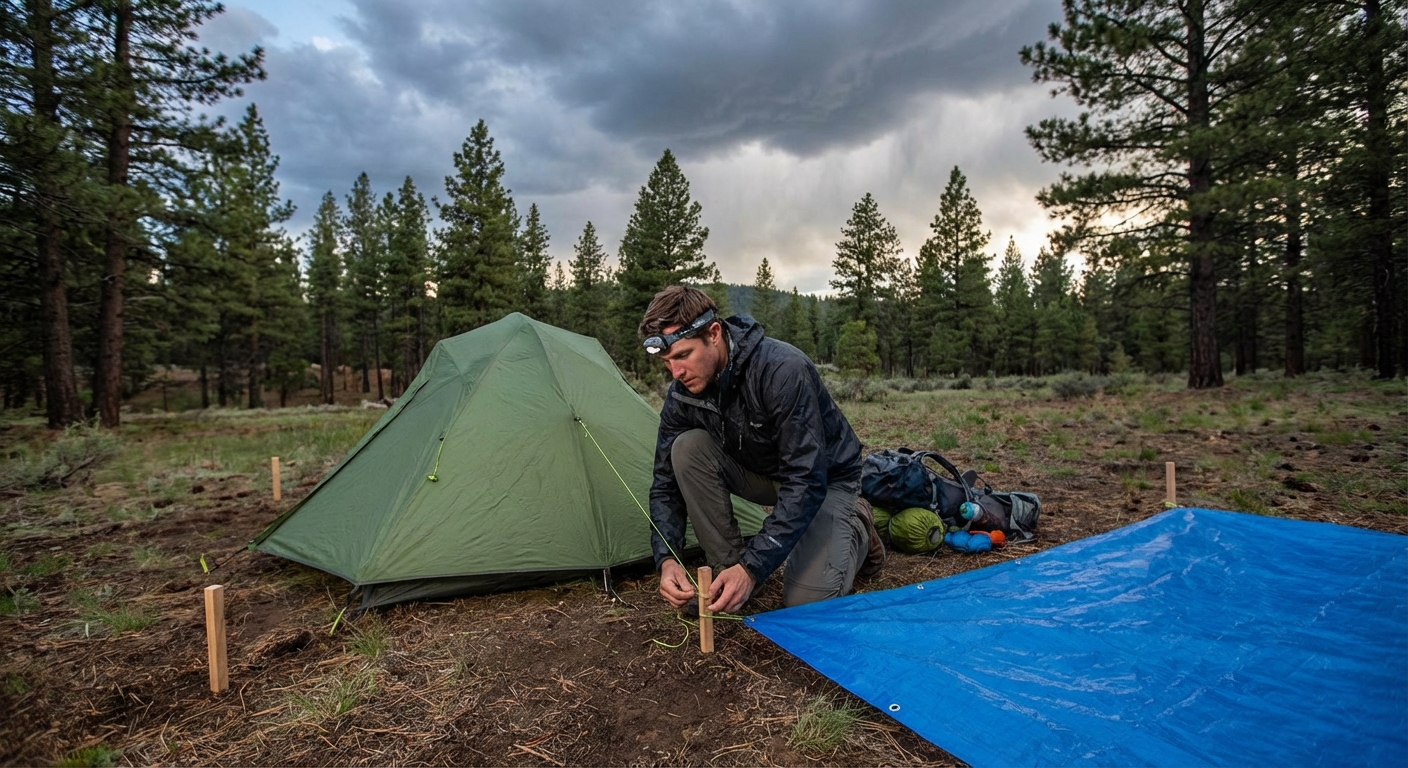
This guide focuses on how to pitch and manage tents and tarps in the real world: fast, solid, and repeatable, even when you’re tired, cold, and racing daylight.
Step 1: Reading the Campsite Like a Guide
Before you even pull your shelter out, slow down and read the terrain.
Key Factors
Wind Direction
- Watch grass, trees, or blowing mist. - Use wet fingers or a light piece of gear to feel airflow. - Aim the lowest profile side of your shelter into the wind.
Water Flow and Drainage
- Avoid depressions and obvious runoff channels. - Look for slight convex ground or a very gentle slope. - Don’t camp in dry creek beds no matter how inviting they look.
Overhead Hazards
- Dead branches (widowmakers) will not care that your shelter is expensive. - Check slopes above for rockfall or loose talus.
Surface and Stake-Ability
- Soft forest duff: easy staking, watch for rot pockets. - Rocky ground: bring strong stakes and use rocks as deadmen. - Sand/snow: longer stakes or buried deadmen systems.
Rule: If the site looks “perfect” but all the trees are bent the same direction, expect wind. Pitch low and tight.
Step 2: A Fast, Repeatable Tent Pitch
We’ll use a typical freestanding or semi-freestanding backpacking tent as the baseline.
1. Lay Out and Orient
- Drop your pack where you want your head.
- Lay the tent body out head into the wind if possible.
- Make sure you aren’t on sharp rocks or roots.
2. Stake the Corners Loosely (If Needed)
- On semi-freestanding tents, stake the two upwind corners first.
- Keep tension light so you can adjust as the structure goes up.
3. Assemble Poles Once, Properly
- Fully seat each pole segment. Partially seated poles are how you snap them.
- For hubbed systems, double-check all joints before clipping to the tent body.
4. Raise the Structure
- Insert tips into grommets or sleeves.
- Clip body onto poles from the center out, not just starting at corners.
- This prevents weird stress points and saggy middles.
5. Attach Fly With Purpose
- Drape fly over the body, align doors with tent doors.
- Attach fly buckles or hooks loosely at all corners.
- Now tighten corner straps gradually and evenly.
6. Stake and Guy Out
- Stake all corners at ~45° away from the tent.
- Add stakes to vestibules under slight tension.
- Guy out key points on the windward side at minimum.
Pro Tip: In rough weather, don’t over-tension. You want a tight pitch, not a drum. Fabric needs a bit of give for gusts.
Step 3: Tarp and Trekking-Pole Shelter Basics
These shelters demand more attention to angles and tension, but the payoff is weight savings.
Common Ridge-Line Pitch (A-Frame Style)
- Find Two Points: Trees, trekking poles, or a combo set roughly 10–15 ft (3–4.5 m) apart.
- Run a Ridgeline: Use a line with quick-adjust hardware (LineLocs, trucker’s hitch, or simple taut-line hitches).
- Drape and Center the Tarp: Make sure coverage is even both sides.
- Stake Windward Side First: Pull the tarp low to the ground on the windward edge.
- Stake Leeward Side: Adjust height to balance ventilation and storm protection.
Trekking-Pole Tent Pitch
Each brand has quirks, but the process is similar:
- Lay Out the Tent: Align with wind direction.
- Stake the Four Corners: Form a clean rectangle or diamond as the design requires.
- Set Poles to Recommended Length: Insert handles or tips up as directed.
- Raise One End at a Time: Insert the first pole, then tension; repeat on the second.
- Fine-Tune: Walk the perimeter, adjusting stake angles and guylines for clean, even tension.
Field Tip: With trekking-pole shelters, corner geometry is everything. If one corner is way off, the whole pitch suffers.
Step 4: Storm-Proofing Your Pitch
When the forecast looks ugly or the sky just “feels wrong,” assume you’ll get hammered.
Anchor Like You Mean It
- Use Y-stakes or V-stakes for soft soil; they hold better than simple shepherd hooks.
- In rock or sand, bury stakes sideways and backfill (deadman anchors).
- Back up key guy lines with big rocks on top of the lines.
Lower and Narrow Your Shelter
- Drop your tarp ridgeline or trekking poles a few inches.
- Pitch fly edges closer to the ground, especially windward.
- Reduce door openings; big vestibule gaps are wind scoops.
Double-Check Stress Points
- Ensure guy out loops are pulling in line with seams, not at odd angles.
- Spread load across multiple guy points instead of cranking a single one.
Reminder: It’s easier to add extra guylines and rocks before the storm, not at 2 a.m. in sideways rain.
Step 5: Condensation Control
You can’t defeat condensation completely, but you can manage it.
Ventilation Basics
- Keep at least one vent or door cracked when possible.
- Pitch with a small gap at the base of the fly on calm nights for airflow.
- Avoid camping right beside streams or in low, cold sinkholes.
Physical Barriers
- Use a solid or partial-solid inner when available in cold, damp shoulder seasons.
- Keep sleeping bags and jackets from touching single-wall walls.
Morning Recovery
- Shake out the fly before packing.
- If sun appears, drape the shelter during breakfast.
- Pack the damp fly separate from the inner if possible.
Step 6: Field Repairs and Improvisation
Things break. What matters is what you do next.
Poles
- Carry one aluminum pole sleeve (splint). Tape it firmly over cracks.
- In a pinch, use a sturdy stick taped alongside the broken segment.
Rips and Holes
- Clean and dry the area as best you can.
- Apply Tenacious Tape inside and outside if possible.
- For high-tension guy-out areas, reinforce with extra stitching when you get home.
Failing Zippers
- Clean out grit using a toothbrush or soft brush.
- Use gentle, steady pressure; don’t force snags.
- If sliders spread, a pair of pliers can sometimes carefully pinch them back into shape.
Gear Recommendations for Better Pitches
Hardware That Punches Above Its Weight
- MSR Groundhog Stakes (or clones): Great holding power; tough.
- Lawson Equipment Ti Stakes: Light and strong for UL kits.
- 10–15 m of 2–3 mm Dyneema or polyester guyline: Less stretch than nylon.
- Mini LineLocs: Make tensioning fast and precise.
Helpful Add-Ons
- Polycro or Tyvek groundsheet for UL tents and tarps
- Small microfiber towel to wipe condensation in the morning
- Stuff sacks with simple labeling (body, fly, stakes) so setup is brainless when you’re wrecked
Practice Before It Matters
Don’t wait until you’re in the alpine with weather closing in to read your tent instructions. Set up your shelter:
- In your yard or a park in dry weather.
- Again in wind or light rain.
- Once more in the dark with a headlamp.
Time yourself and refine the sequence until it’s automatic.
Final Takeaway
A well-pitched budget tent beats a poorly pitched premium shelter every single time. Learn to read a site, orient your shelter to wind and water, and tension everything cleanly. Once those skills are wired in, your tent or tarp fades into the background—and the miles get a lot more comfortable.